How to create an EOS account

Here is our tutorial video on how to create an EOS account and start playing. If you prefer to have a look at a written guide, feel free to keep on reading below.

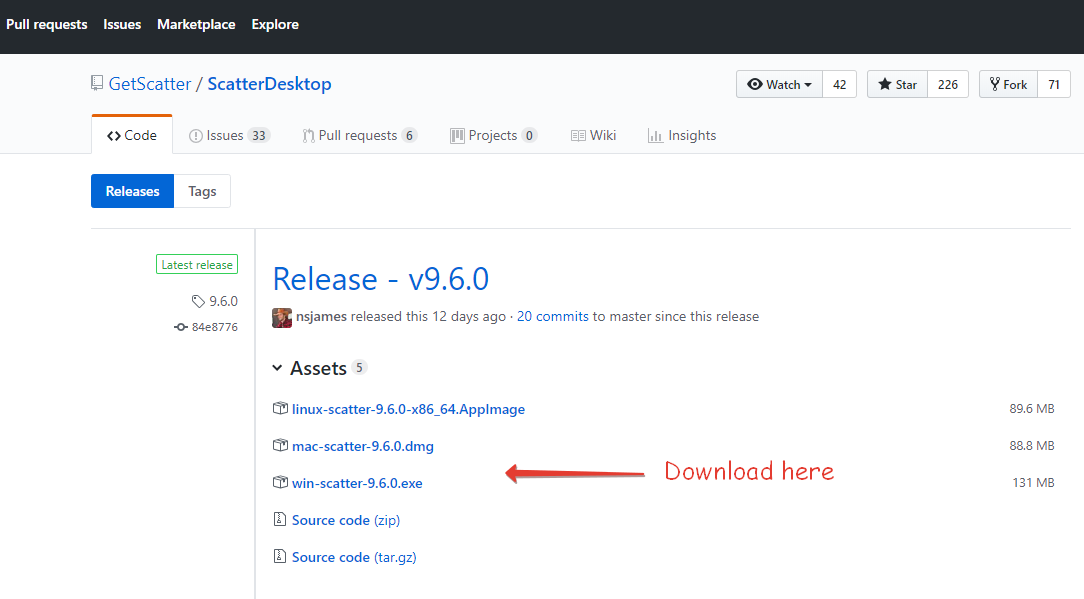
1. Install Scatter. Follow this link and choose the compatible version to download it (see the pic below).

github-scatter-download

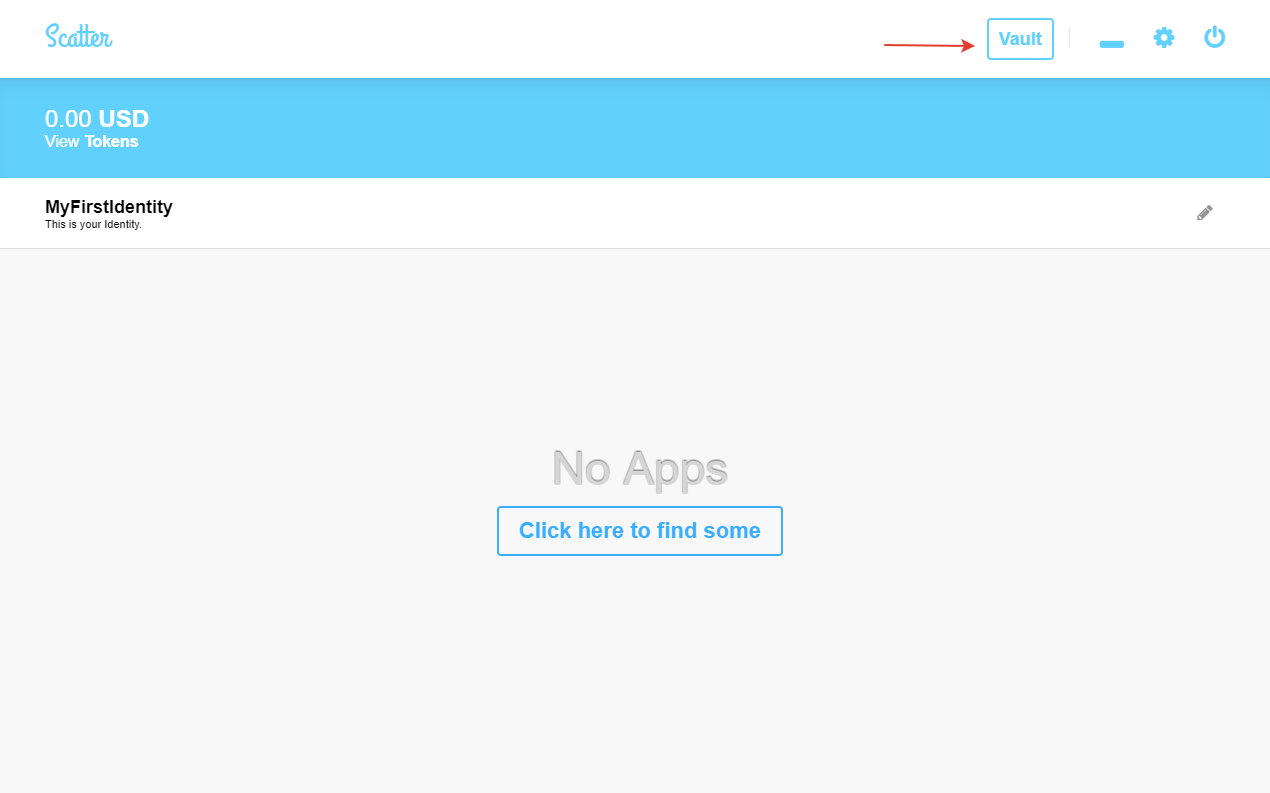
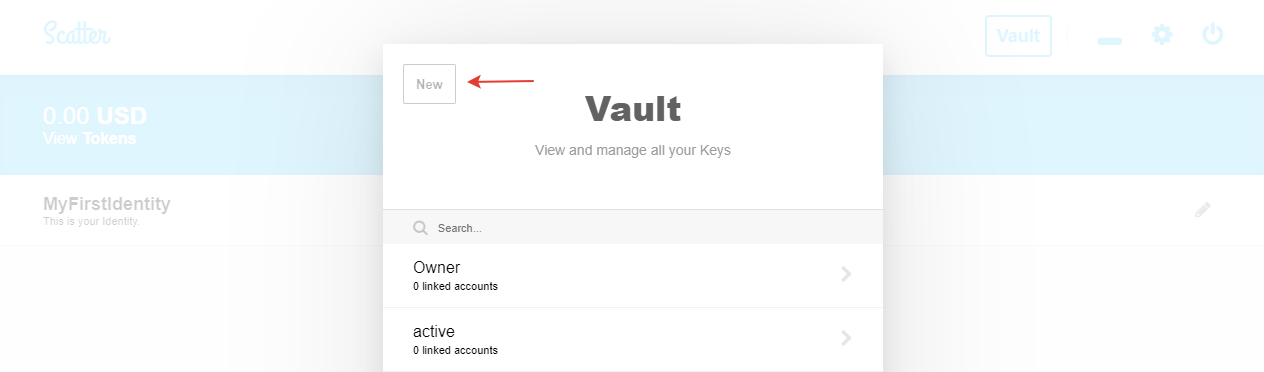
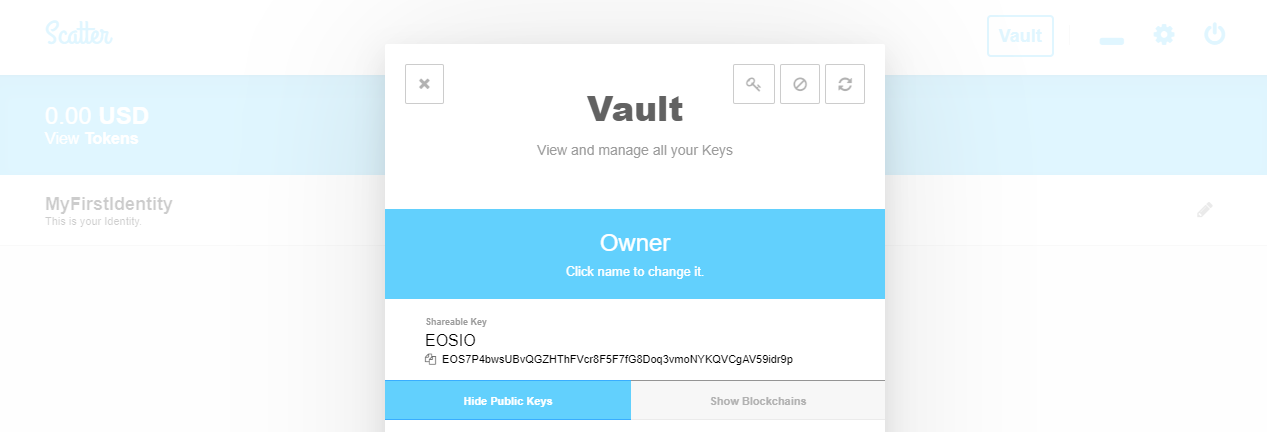
2. After you’ve downloaded and installed Scatter, enter the app and set up a password (it’s not critical if you forget this password as you can always import your old info via a new account). Save the mnemonic 12-word phrase and go on to create key pairs.

3. Click Vault at the top of Scatter’s interface.

Vault in Scatter

Then you should make 2 key pairs (one pair with a private and public key and a second pair with a private and public key). Name one of the pairs “Owner” and the other one “Active”. Click New, then make up a name (“Owner” for the 1st pair) and click Create.

New pairs in Scatter

Select EOSIO in the opened window. After that, you’ll see a hidden private key. You MUST save it so that you don’t lose it! You cannot share your private key with anyone else. After it’s been created return to Vault and click Show Public Keys – there you’ll see your public key made for your 1st private key.

Showing public key

That is the one you’ll be using. Now repeat the step above to create a second pair of keys (the one you named “Active”).

4. Save the 4 keys (strings of symbols) you now have in a safe place.

5. [Optional] It’s advisable to remove the “Owner” pair of keys from Scatter, as in fact you’ll only need one pair. The second pair is needed if you lose your “Active” pair. Then you’ll be able to remove its permissions to your account using your “Owner” pair. That is, if anything should happen you will be able to deprive the “Active” pair of all permissions and assign them to another pair via your “Owner”. Should you decide to keep both, you may get prompted by Scatter at times to select one of them to sign transactions.

6. There are two ways you can create an EOS account. You either find someone who already has an account and can create one for you (an experienced friend or someone you trust). Or you can use a 3rd party service, for instance eos-account-creator.
eos account creator
Watch this account creation video here.

7. If you’ve decided to make an account by yourself, then come up with a name for your account in eos-account-creator. The name must be 12 characters long (latin letters and digits from 1 to 5).

8. Paste two public keys you created before.

9. Pay a small amount for creating the account via eos-account-creator. Why you have to pay: the creation itself is not free of charge as it requires 3 resources: RAM, CPU and NET. These are what EOS get allocated towards. They are either spent by your friend (who created your account for you), or by you when you pay to a service. In this case your funds are converted into RAM, CPU, NET that you can then use as you see fit.

10. Check whether you account has been created. You can do that at eosflare. Just enter the name of your account at the top of the site.

eosflare

11. Open Scatter and then Vault and your previously created “Active” pair. Click the “Refresh Linked Accounts” button.

12. You need to top up your wallet with EOS. Let’s say 20 EOS to begin with. You can use either binance or freewallet. Learn more about using binance here.

13. Now you can distribute the EOS you bought: you may allocate 10 EOS to CPU, 2 EOS to NET and 5 EOS to RAM. All that can be done via your “Active” pair in Vault. There you’ll see these three resources (CPU, NET, RAM). Read the “additional information” section below to learn more about these three.

staking

14. Join the game.

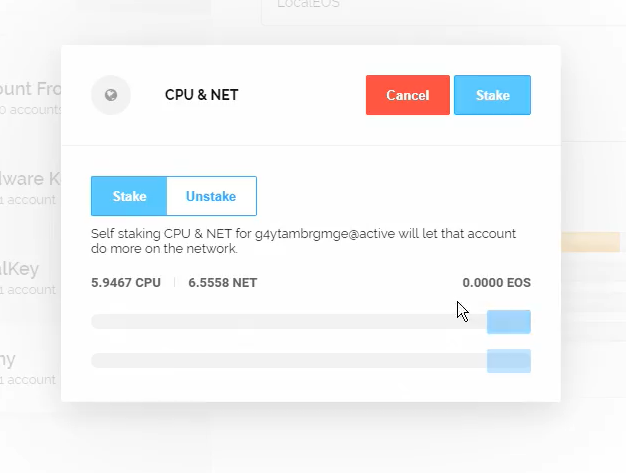
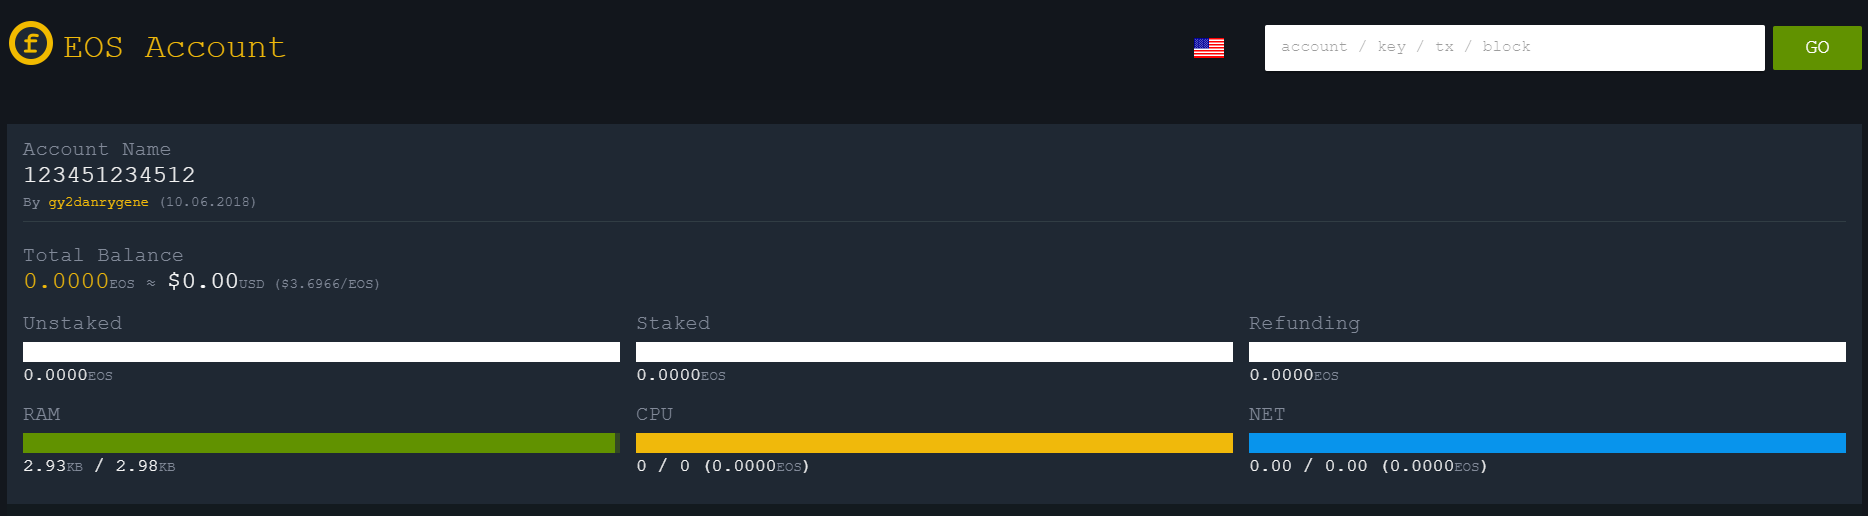
CPU is the processing power responsible for calculations. It works like gas on Ethereum.

NET bears the network functions: if you need some data transferred, this is the parameter that is spent.

To use CPU and NET one needs to stake(=freeze) some EOS. That is, you do not actually buy them but borrow for a time. So you can stake 10 EOS to CPU and 2 EOS to NET and you can take them back afterwards if you feel like it. CPU and NET are spent when transactions are made. These two resources are renewable (they get refilled once in a certain period of time). When frozen, the EOS staked can’t be used.

RAM is like a data storage device. It represents memory, and it is not renewable. After each transaction is executed, RAM gets depleted a bit. That is the resource you’ll need to buy (not stake/freeze). For that you can use various services, like feexplorer.